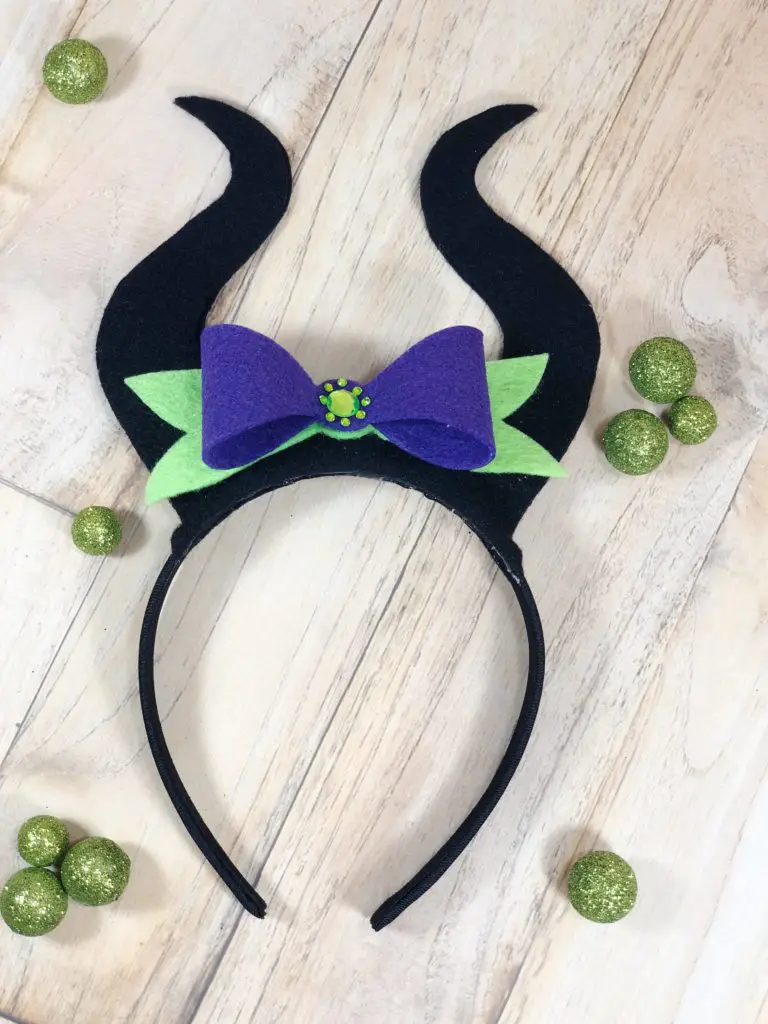
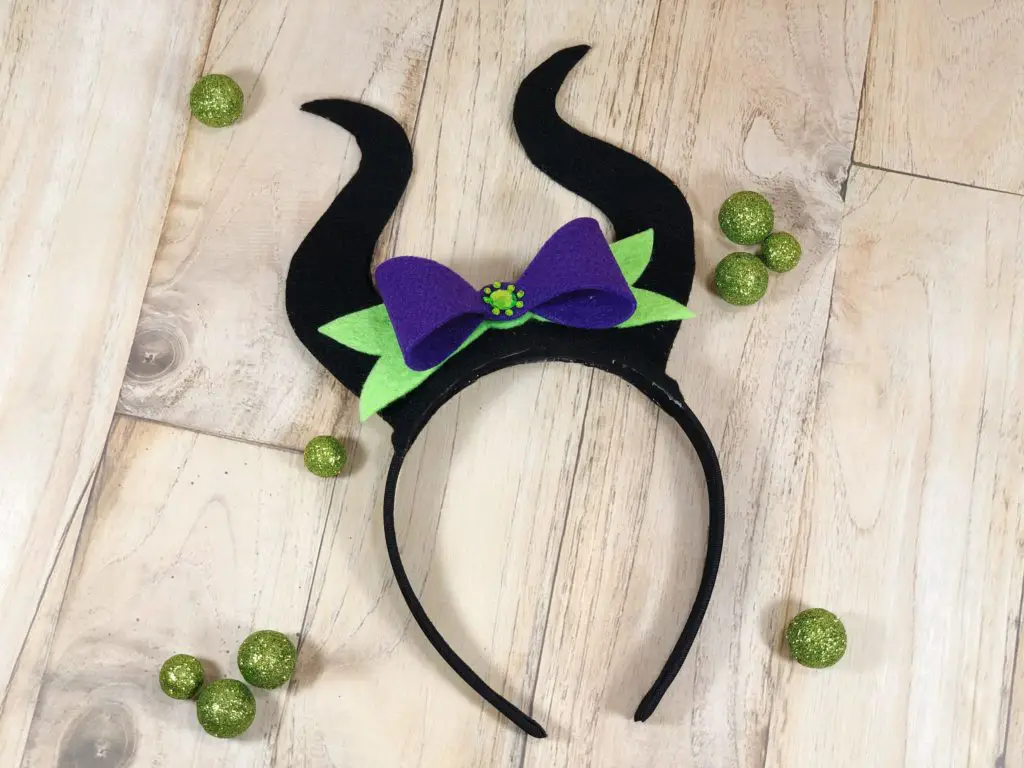
DIY No-Sew Felt Maleficent Headband Craft
Do you have a Disney fan in your house? Are you looking for a cute item that you can make at home and let the kids put on anytime they want? If so, you’re going to love this DIY Felt Maleficent Headband. It’s such a simple craft project that takes minutes to make. You can be certain that this is going to be a hit with the kids! And a simple way to give them more options to dress up.
If you have kids in the house that are fans of the Maleficent movies, they’re going to love this easy DIY craft. It’s great for all ages and it’s a fun and easy craft to do. All you need are a few easy materials to get started.
We made these up in a short amount of time and had a blast wearing them while watching the movie. It’s a great activity to do together and even more fun to wear this headband, too!
DIY Felt Maleficent Headband
All you need are the supplies below to get started on this simple Disney craft!
Supplies Needed for this Maleficent Headband DIY
- PATTERNS
- Craft Felt Sheets – Black, Orchid and Neon Green
- Headband – Black, Wide
- Rhinestones – Bright Green
- Permanent Marker – Fine Tip
- Stabilo Aquarellable Pencil – White
- Glue Gun and Glue Sticks
- Scissors
How to make this Disney headband
STEP ONE
Download, print and cut out PATTERNS. Lay the headband over the top of the paper pattern and trace the arch to match.
STEP TWO
Trace two Maleficent horn patterns onto the sheet of black craft felt with a white chalk pencil and then cut out. TIP: Cut all patterns out inside the traced lines to create a clean finished project.
STEP THREE
Starting at the top point of both horns, carefully attach two patterns together, leaving a 2” section open at the base.
STEP FOUR
Attach the base of the horn pattern to the front and then to the back of the headband with the glue gun.
Here is a detail of the gluing process.
STEP FIVE
Carefully attach the right and then the left sides of the horn pattern to the top edge of the headband with the glue gun.

STEP SIX
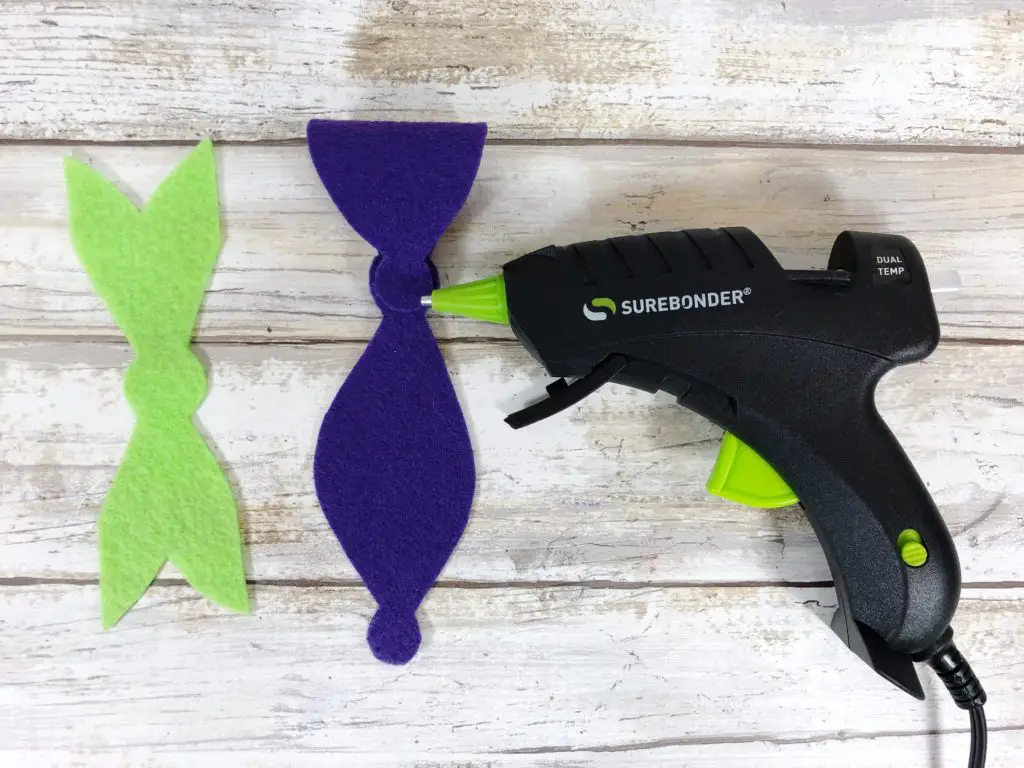
Trace and cut out Maleficent bow patterns from orchid and neon green craft felt sheets.
STEP SEVEN
To create the bow, attach the right and left ends of the orchid felt shape to the center and then secure it with the glue gun. Adhere neon green bow tails to the bottom of the bow with the glue gun.
STEP EIGHT
Flip the bow over and attach one large and several small bright green rhinestones to the center in a circular pattern.
STEP NINE
To finish, attach the bow to the headband with the glue gun.
This quick and easy Maleficent Felt Headband is a great project to create with tween and teen girls in just about 30 minutes.
More Disney Crafts
- Savvy Ways To Save Money at Disney
- 30 Days of Disney on Freeform Schedule with Printable Calendar
- The 20 Best Disney Holiday Ideas for Crafts and Recipes
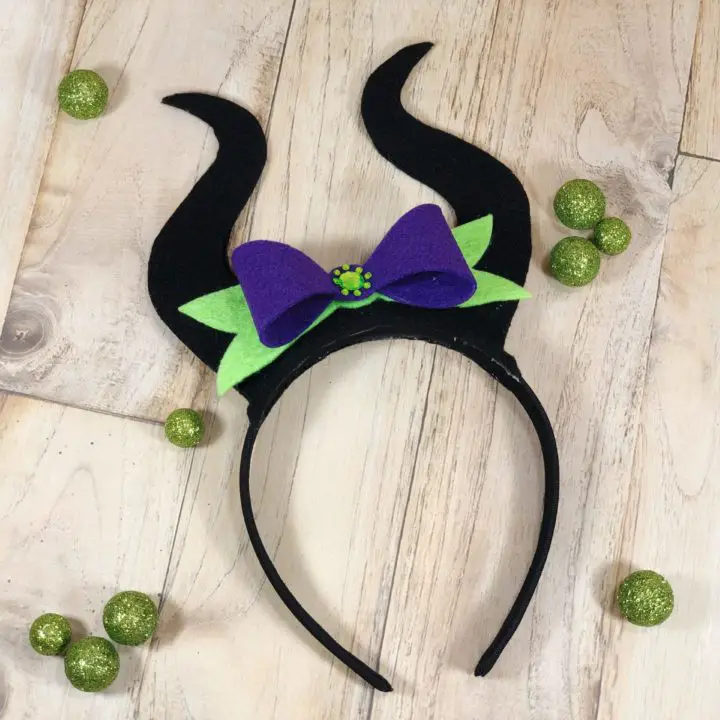
Maleficent Felt Headband DIY
This simple DIY Maleficent headband is fun and easy to make.
Materials
- PATTERNS
- Craft Felt Sheets – Black, Orchid and Neon Green
- Headband – Black, Wide
- Rhinestones – Bright Green
- Permanent Marker – Fine Tip
- Stabilo Aquarellable Pencil - White
- Glue Gun and Glue Sticks
- Scissors
Instructions
- Download, print and cut out PATTERNS. Lay headband over top of paper pattern and trace the arch to match.
- Trace two Maleficent horn patterns onto the sheet of black craft felt with white chalk pencil and then cut out. TIP: Cut all patterns out inside the traced lines to create a clean finished project.
- Starting at the top point of both horns, carefully attach two patterns together, leaving a 2” section open at the base.
- Attach the base of the horn pattern to the front and then to the back of the headband with glue gun.
- Carefully attach the right and then the left sides of the horn pattern to the top edge of the headband with the glue gun.
- Trace and cut out Maleficent bow patterns from orchid and neon green craft felt sheet.
- To create bow, attach right and left ends of orchid felt shape to center and then secure with the glue gun. Adhere neon green bow tails to bottom of bow with glue gun.
- Flip bow over and attach one large and several small bright green rhinestones to center in a circular pattern.
- To finish, attach bow to headband with the glue gun.
Recommended Products
As an Amazon Associate and member of other affiliate programs, I earn from qualifying purchases.
-
 Fiskars 01-004761J Softgrip Scissors Straight Stainless Steel, 8 Inch
 -
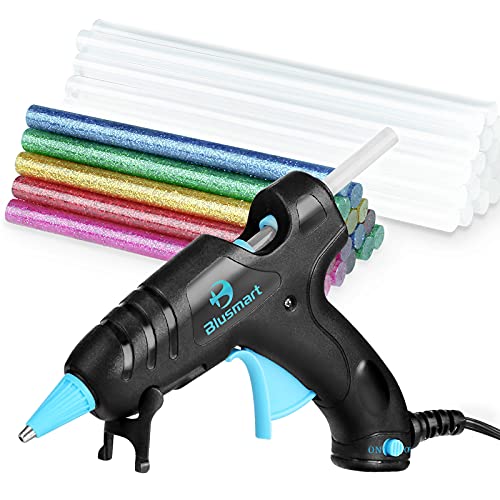 Upgraded Blusmart Hot Glue Gun, 20W High Temperature, 20pcs Glue Sticks and 10 Colors Sticks , Ideal for Quick Repairs, DIY Projects & Arts(New Style)
 -
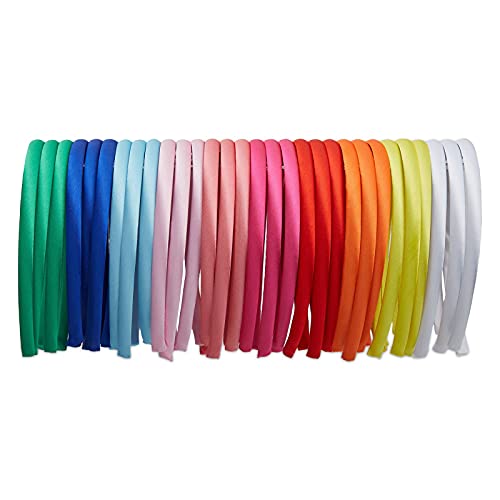 Satin Covered Headband - 60-Pack 10mm Head Band, Hard Headband, Fabric Headband, Hair Accessories for Girl Women Teen Favor, for DIY Craft Art, Accessory Making, 10 Colors, 4.5 x 5.25 x 0.39 Inches