
How to Make Your Own Quick and Easy DIY Lorax Costume
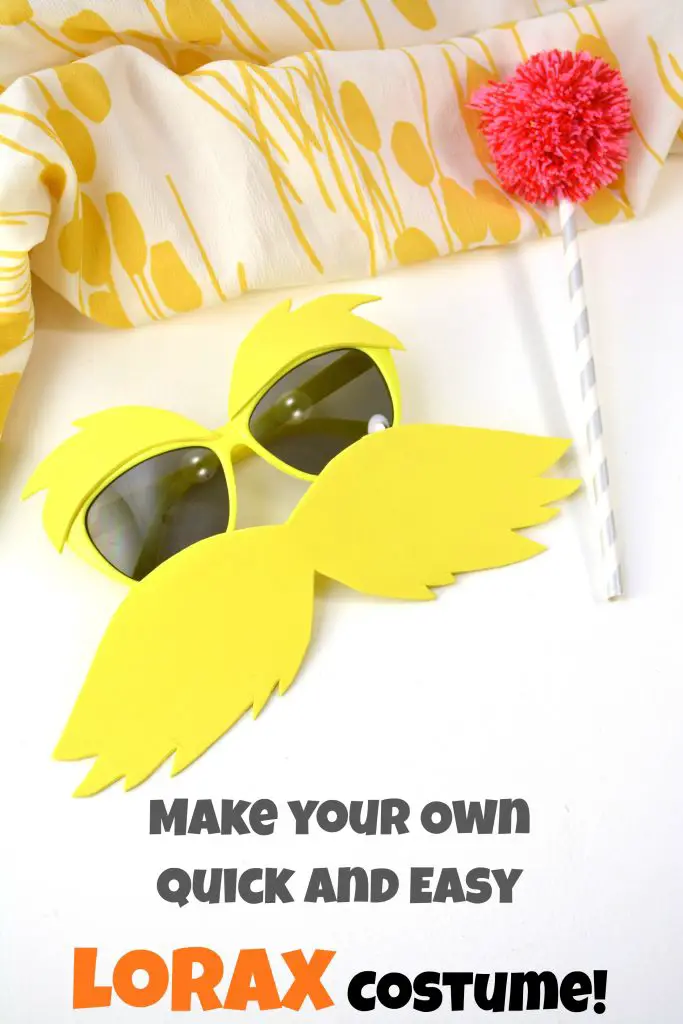
Create Your own Lorax Costume
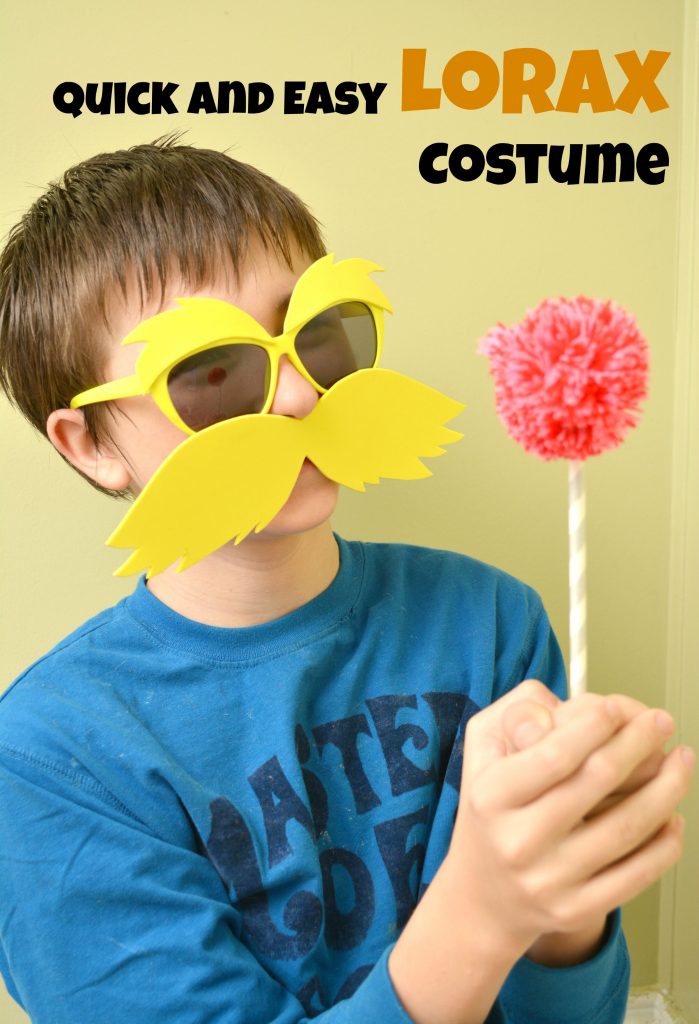
We’ve been celebrating all things Dr. Suess in my house all week and crafting like crazy. Tonight we are reading The Lorax and then watching the movie, so the kids are excited to be wearing their DIY Lorax Costume.
I love that The Lorax is not only just an adorable story, it also shares a critically important message with our children about caring for our environment.
With Dr. Suess’s Birthday just days away, I thought I’d share this quick easy craft that will turn your kids into Loraxes with just a few supplies.
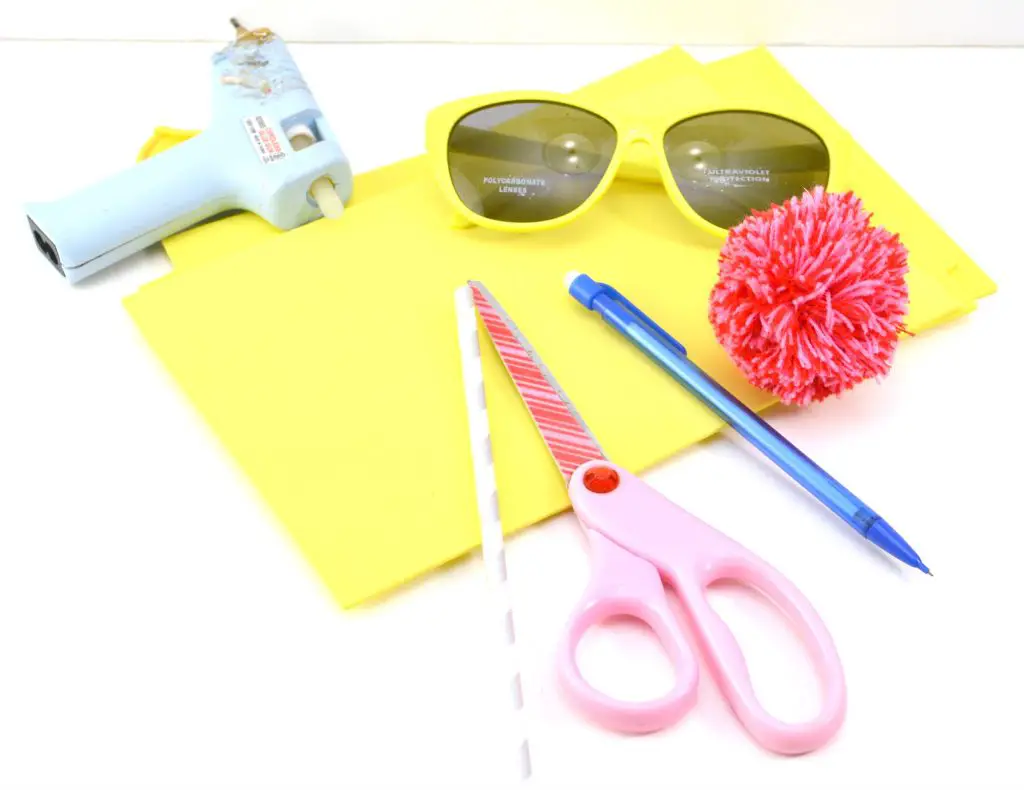
Lorax Costume Materials:
Yellow sunglasses
Yellow craft foam
Large craft pom pom
Striped paper straw
Hot glue gun
Scissors
Lorax Costume Instructions:
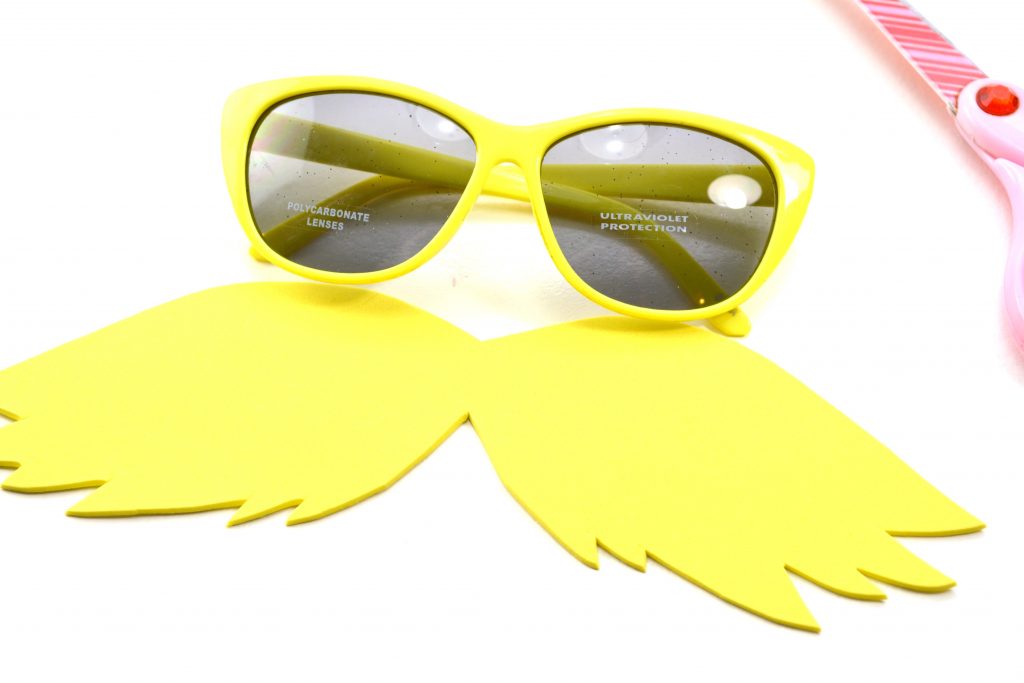
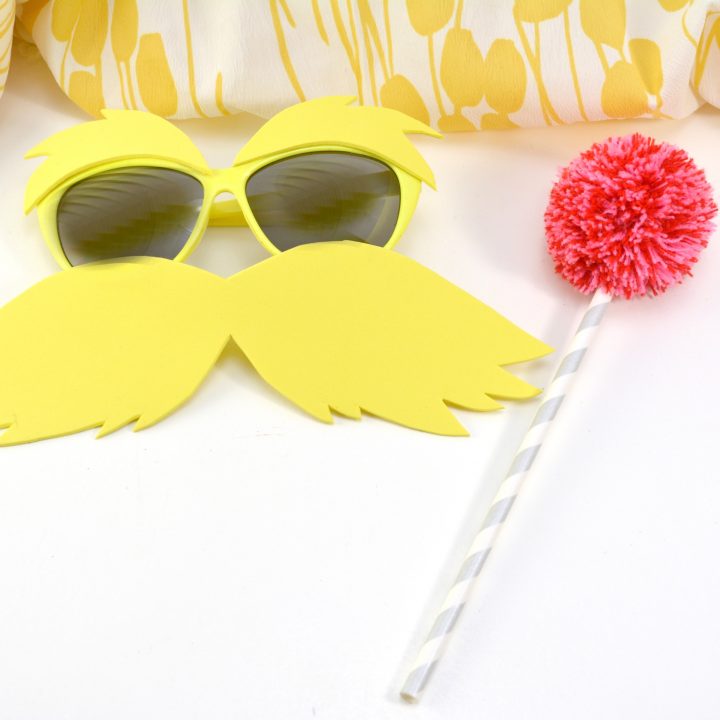
Using your yellow glasses as a guide, cut out a Lorax mustache from the yellow craft foam. This does not have to be exact or perfect. You want it to follow the natural curve of the bottom of the glasses, as that is where it will eventually be glued. The top of the mustache can be a wide “m” shape, and the bottom can just be a random series of jagged cuts. See the photo for reference on what this should look like.
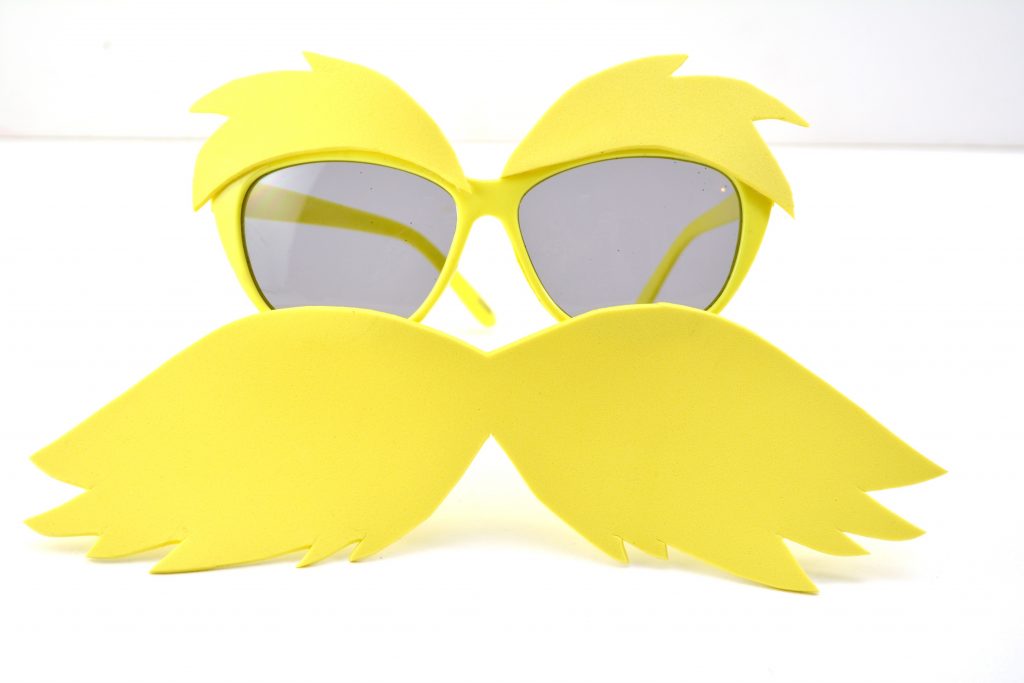
Use the top of your glasses as a guide to cut out two Lorax eyebrow shapes from the yellow craft foam. You can trace the natural curve of the glasses if it helps, and then just add a few jagged cuts in an arch to form the bushy eyebrows.
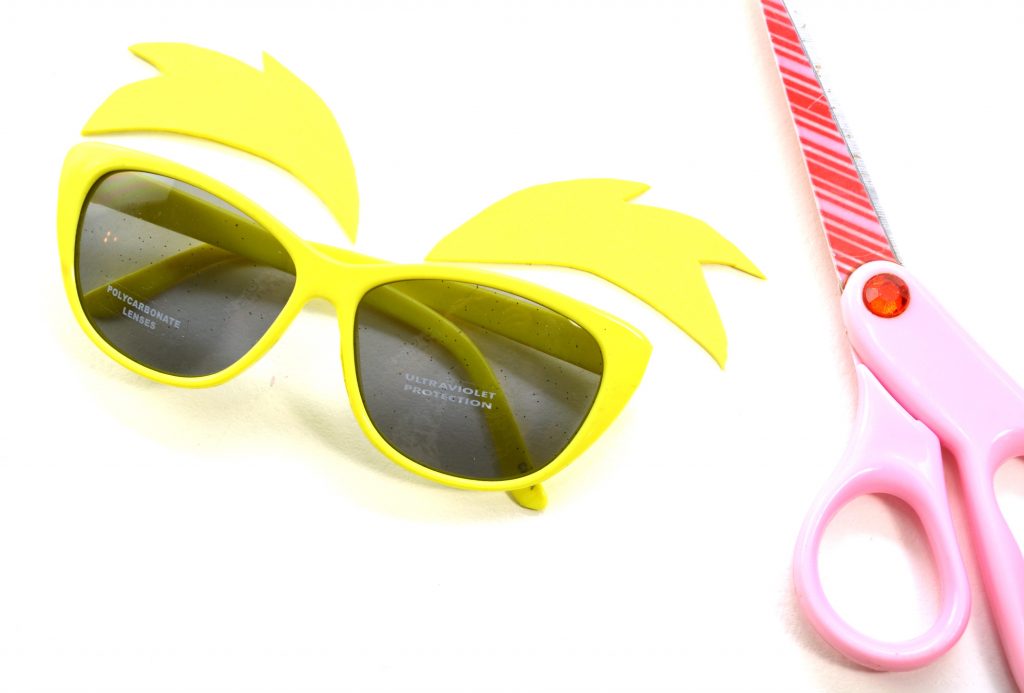
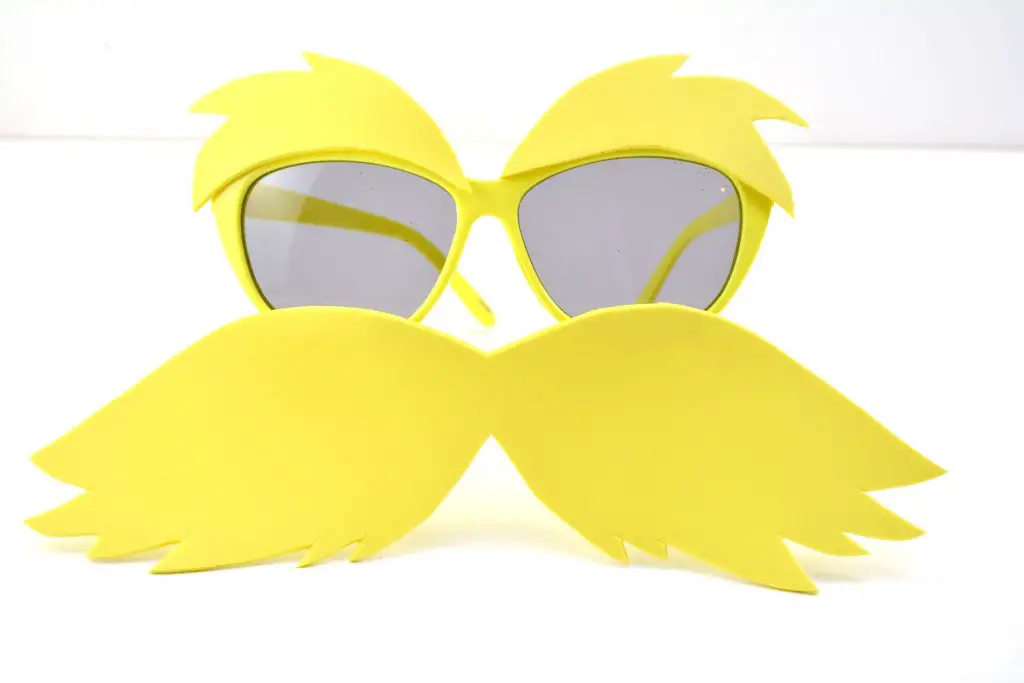
Using a hot glue gun, attach the mustache shape to the front of the bottom of the sunglasses.
Use glue to attach the two eyebrows to the front of the top of the sunglasses, one on each side.
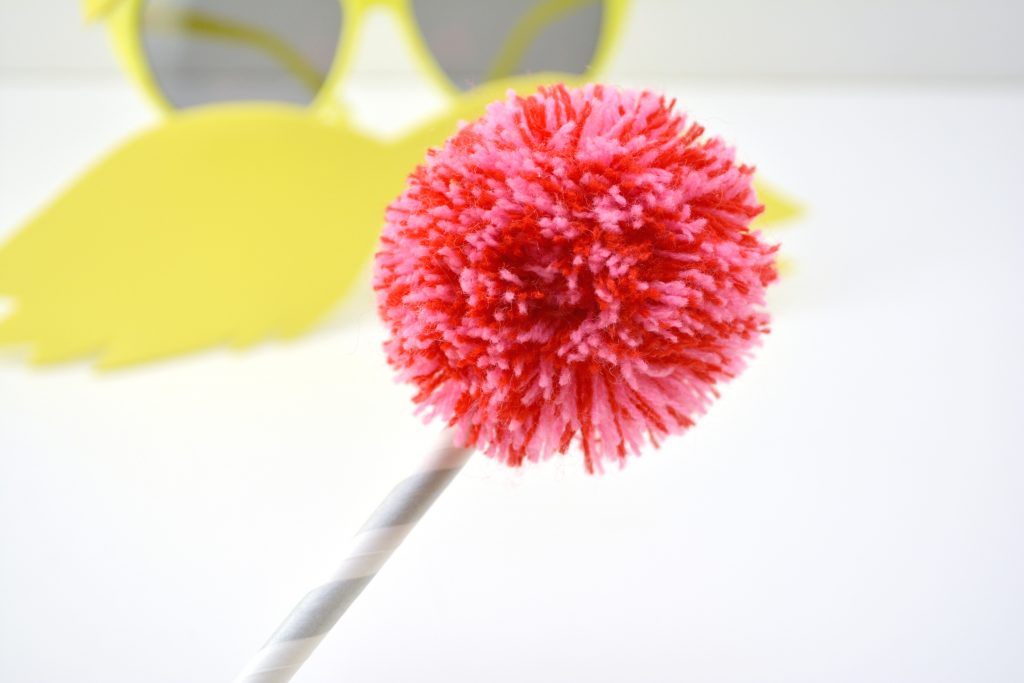
Attach a large craft pom pom to the top of a striped paper straw with hot glue. This will be the truffula tree prop for your Lorax costume.
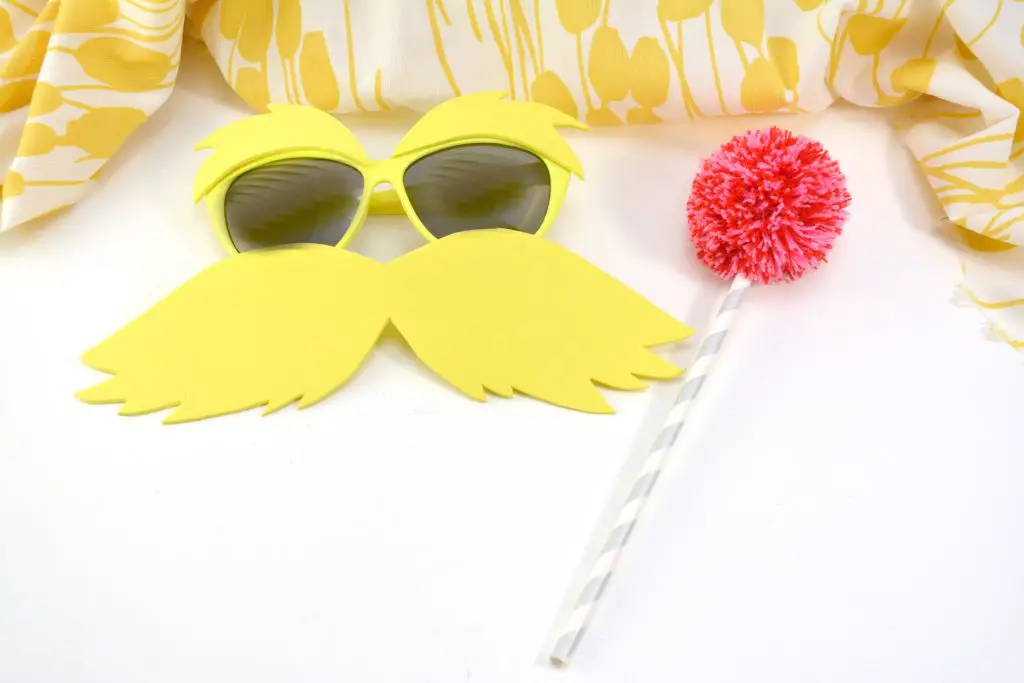
Put the glasses on, and your Lorax mask is complete. Now that you have a fun Lorax Costume, why not give this fun Truffula Tree Paper Plate Craft a try?
What fun ways are you celebrating Dr. Suess’s Birthday this year?
DIY The Lorax Costume
Are you celebrating Dr. Suess Day? We are reading The Lorax and the kids are excited to be wearing their DIY Lorax Costume. Learn how to make one here!
Materials
- Yellow sunglasses
- Yellow craft foam
- Large craft pom pom
- Striped paper straw
Tools
- Hot glue gun
- Scissors
Instructions
- Using your yellow glasses as a guide, cut out a Lorax mustache from the yellow craft foam. This does not have to be exact or perfect. You want it to follow the natural curve of the bottom of the glasses, as that is where it will eventually be glued. The top of the mustache can be a wide “m” shape, and the bottom can just be a random series of jagged cuts.
- Use the top of the glasses as a guide to cut out two Lorax eyebrow shapes from the yellow craft foam. You can trace the natural curve of the glasses if it helps, and then just add a few jagged cuts in an arch to form the bushy eyebrows.
- Use glue to attach the two eyebrows to the front of the top of the sunglasses, one on each side. Then attach the Mustache to the bottom of the glasses with the glue.
- Attach a large craft pom pom to the top of a striped paper straw with hot glue. This will be the truffula tree prop for your Lorax costume.
- Put the glasses on, and your Lorax mask is complete.
![DIY Mummy Water Bottles [Quick Halloween Craft]](https://mommyhoodlife.com/wp-content/uploads/2018/10/quick-easy-halloween-crafts.jpeg)
Ha! I always throw a huge Halloween party and never have time to dress myself. I never thought about something so easy. I know this is for kids, but I think I know what I’m going as this year!
Oh my goodness what an awesome quick and easy costume idea! I mean who doesn’t love the Lorax as well!
That is so cute! My daughters and I love The Lorax. It’s one of our favorite movies.
This is so cute! Great quick costume idea.
This looks like a cute costume for kids & super easy too!
This looks so fun! I love crafts and creating things from scratch, it is good to be creative like that.
Quick and easy costume to make with the kids. What a great way to celebrate Dr. Seuss’s Birthday and have some fun.
It looks so cute! I can’t wait to make one for my kid. Thanks for sharing!
Nice! This looks so easy to do. My niece would love to do this.
Hi!! Can you tell me if your craft foam was 1mm thick or 2mm? Thanks!