
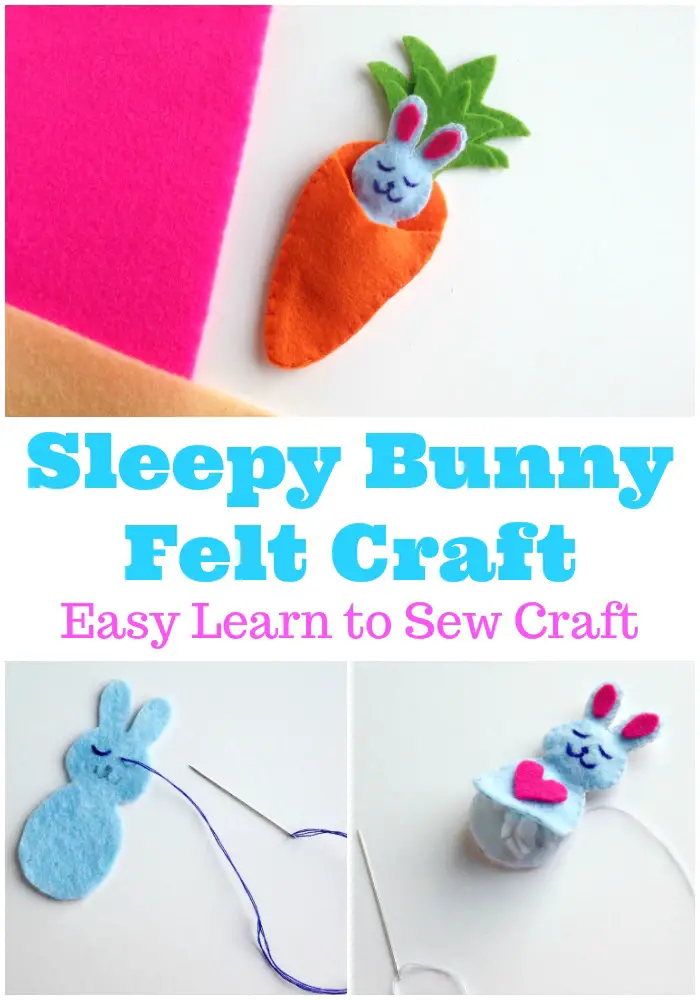
Sleepy Bunny Easy Easter Felt Craft Learn to Sew Project
This easy Easter felt craft is a cute way to teach your children to sew. I remember as a child sitting with my Nana as she taught me how to sew buttons onto a washcloth. She then went on to teach how to take in the waist of pants, create fun little projects, and even knit. She was one of the Nana’s whose cookie tin was actually full of sewing supplies, and that was perfectly fine with me!
I loved sitting next to her learning how to create things with my hands. By the time I was a teenager, she bought me a sewing machine which, however having kids of my own has brought out my love of sewing by hand.
Easter Felt Craft Learn to Sew Project
I still love pulling out a needle and thread for small projects like this, as my daughter sits next to me looking on, just as I did at her age. She really enjoyed making this Easter Felt Craft called Sleepy Bunny and is already thinking of all the other stuffed felt projects we can make together.
I hope this craft draws out the same enthusiasm in your children!
Easter Felt Craft Project
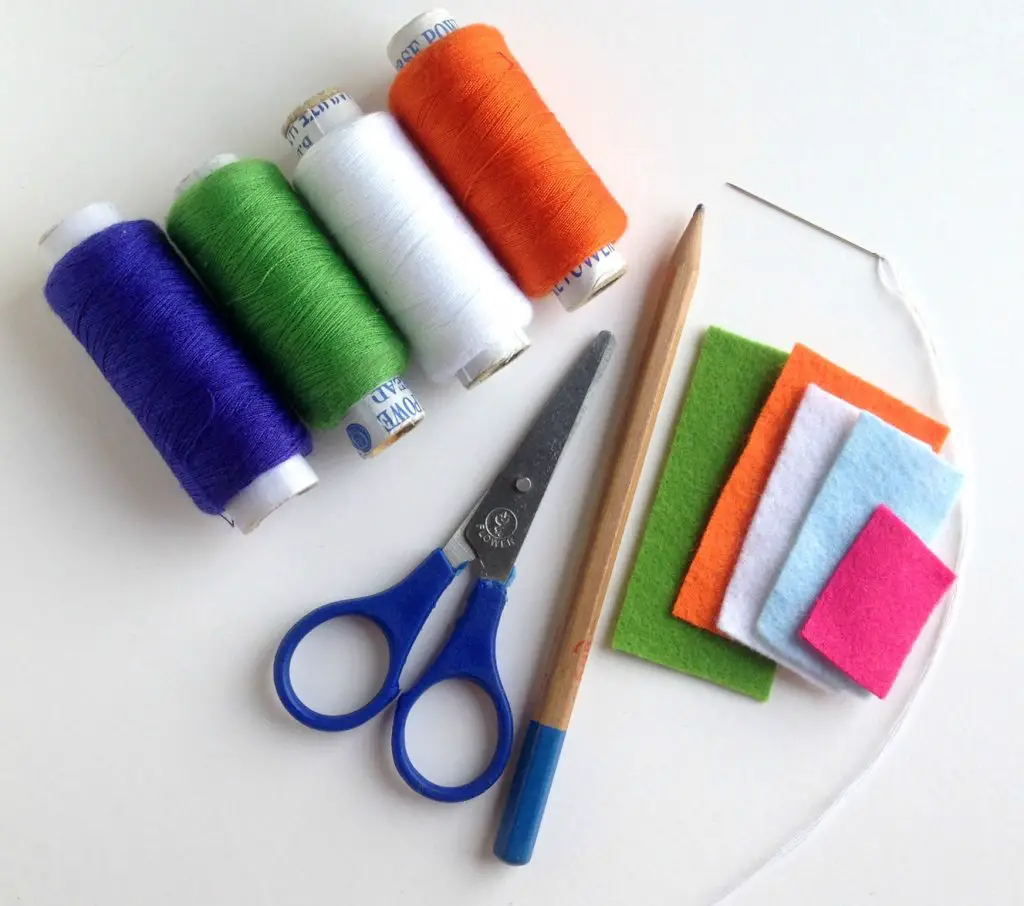
What you need:
Felt fabric – orange, green, and 2 or 3 other colors of your choice.
Scissors
Matching thread and needle
Fabric glue (optional)
Pencil – to trace the template
Template
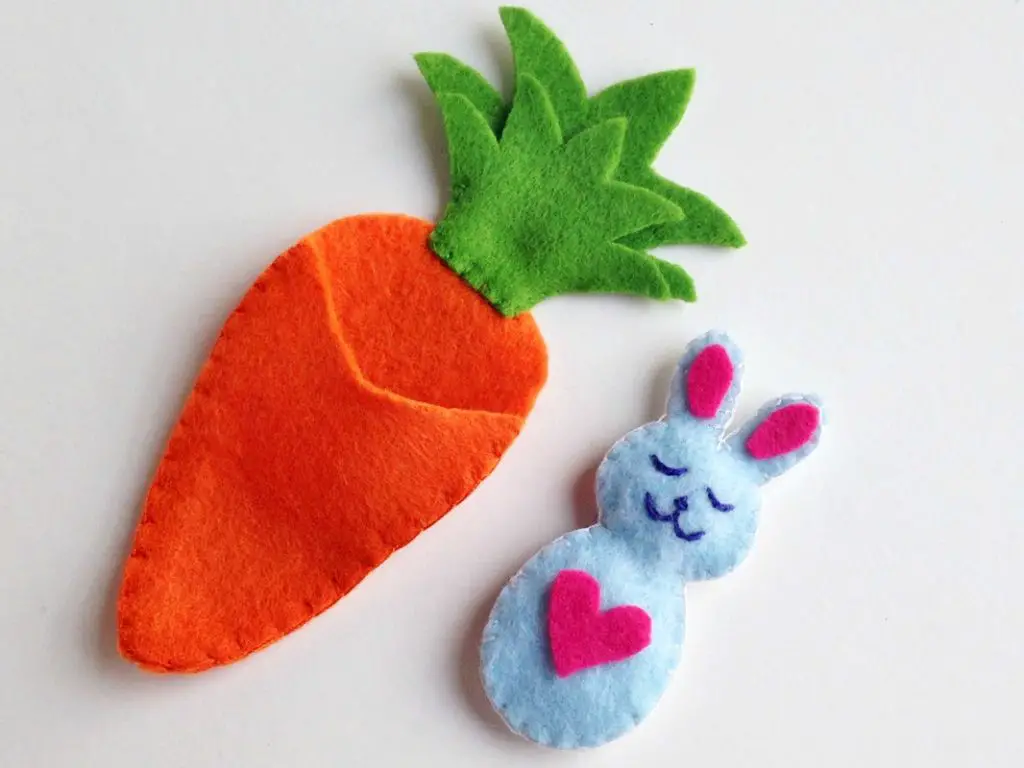
First, print and cut out the patterns from the template. Trace the patterns on the selected felt fabrics and cut them out carefully.
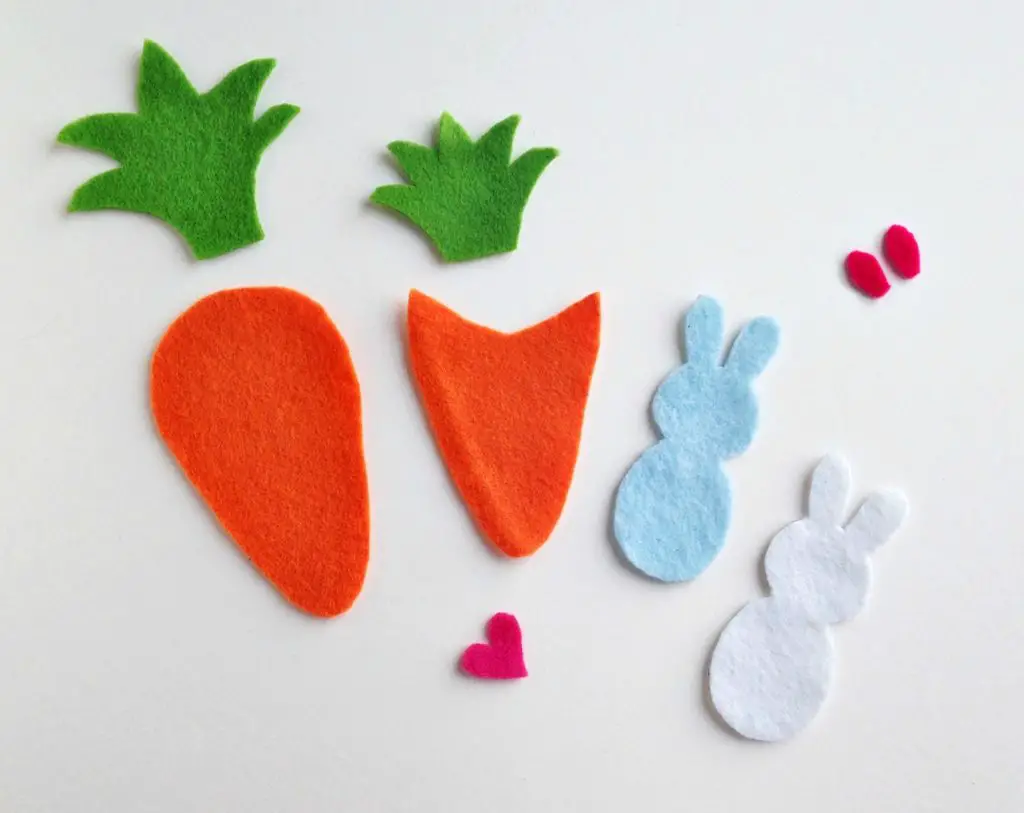
There are 2 body parts for the bunny, take any one of the body parts and prepare black or dark-colored thread and needle.
Draw the face details and stitch the details by simply doing flat blanket stitches.

Once done stitching the face details attach the 2 inner parts of the ears and the heart pattern.
You can either glue or stitch these patterns, however, you wish to.
Place the 2 body parts together (one on top of the other one), placing the detailed part on the top.
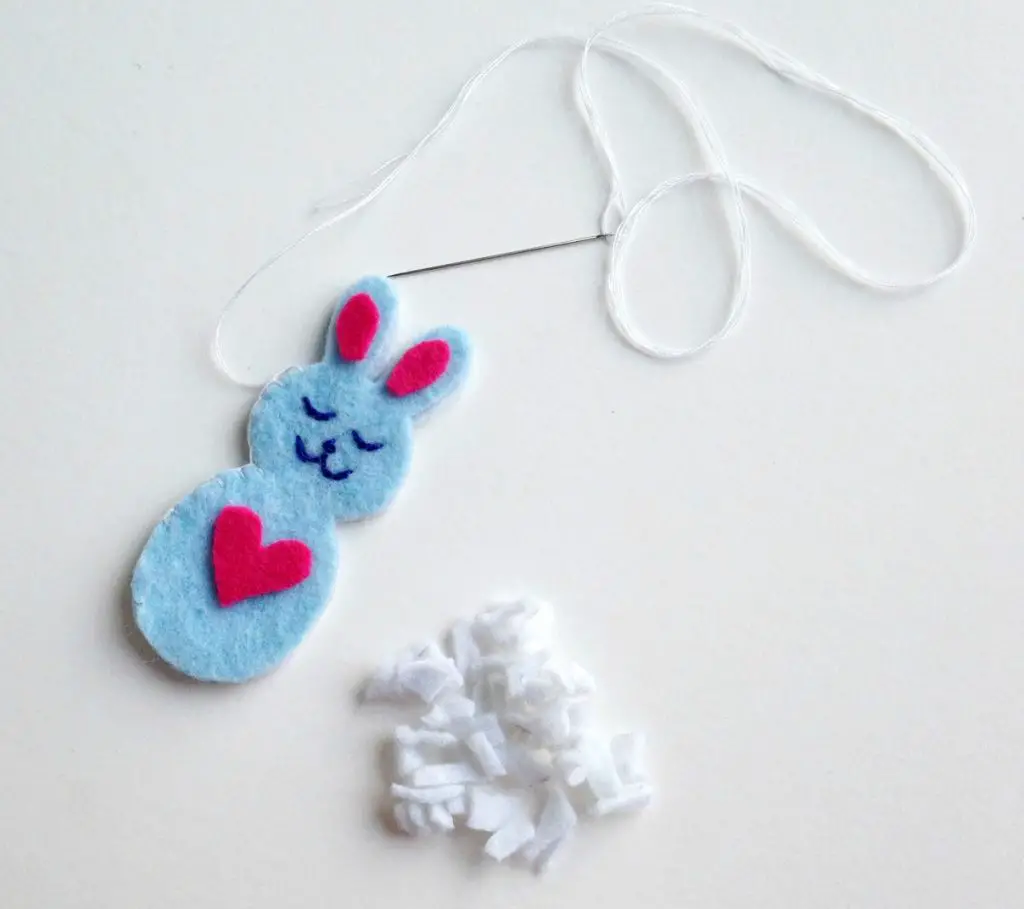
Prepare a needle and thread to stitch around the sides of both parts to join them.
Start the stitch from anywhere but make sure to keep a small opening for stuffing. You can use the leftover felt pieces for the stuffing. Cut the leftover felt pieces into small pieces.
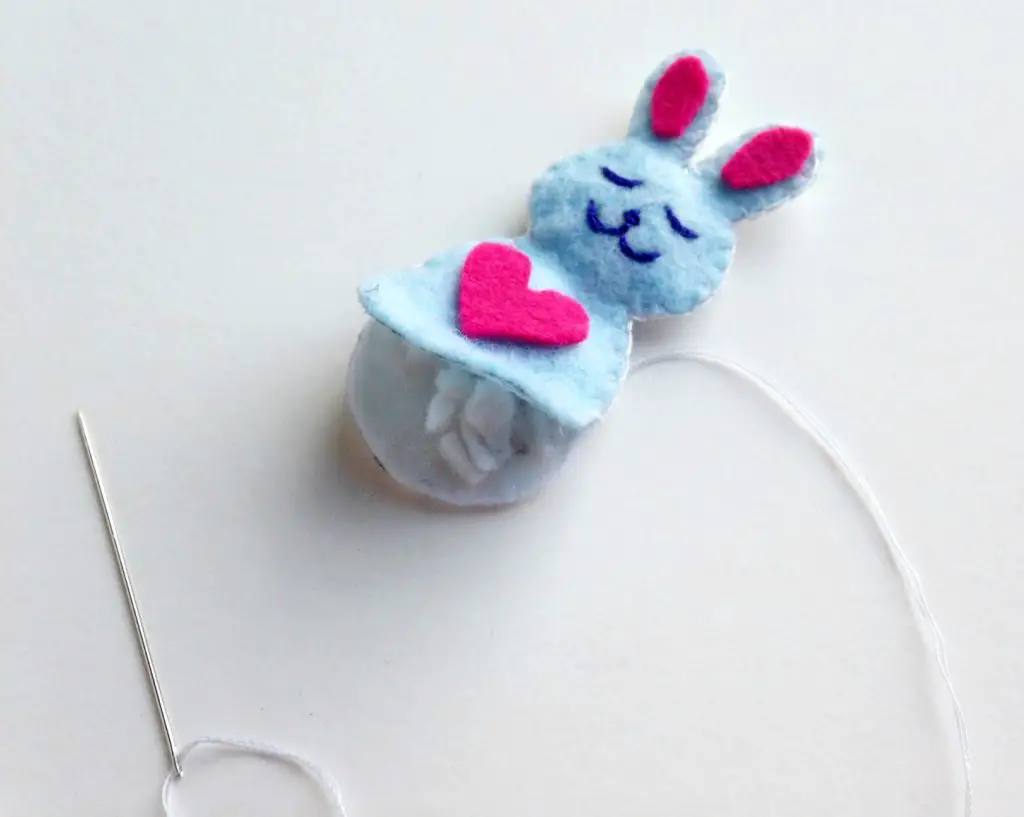
Fill the bunny pattern with the felt pieces, and use something thin and pointy (a pencil should do) to push the stuffing toward the head of the bunny.
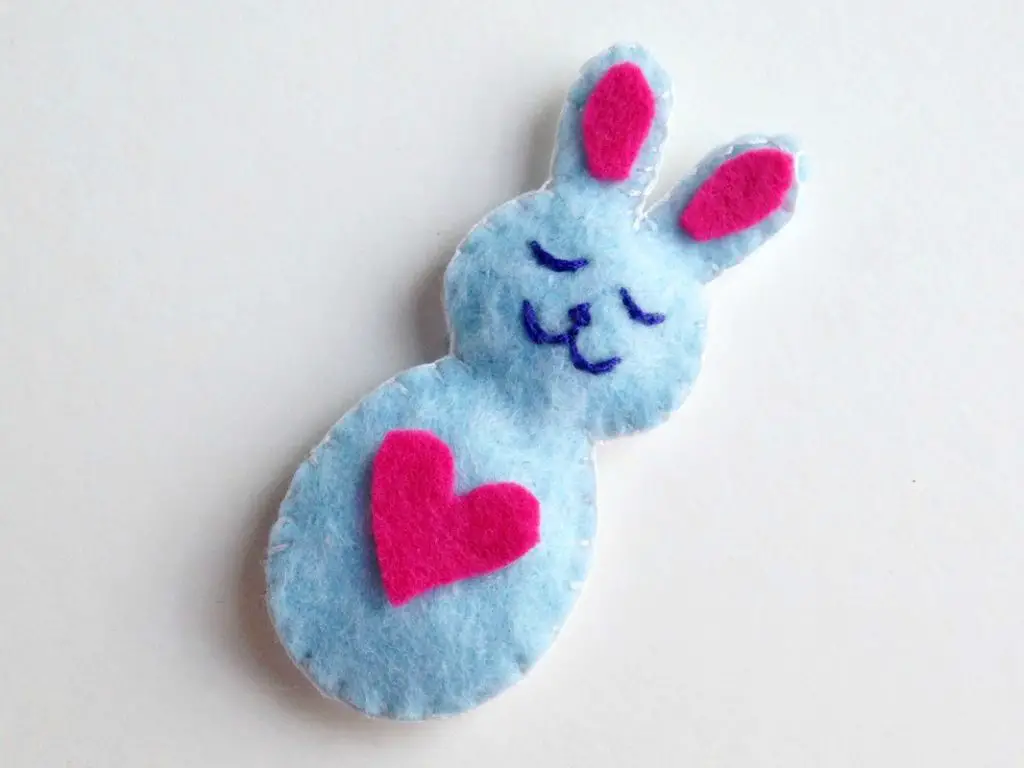
Done stuffing? Close the open end to secure the stuffing. Tie 2 tight knots and cut off extra thread.
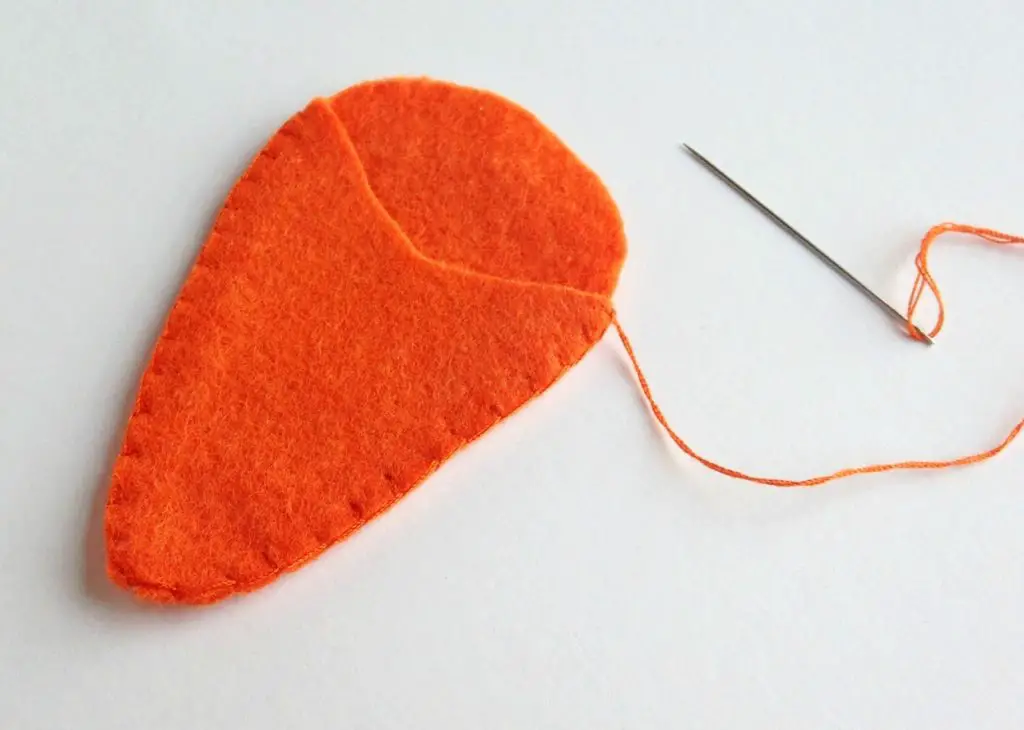
Take the 2 parts for the carrots and place the smaller one on top of the big one; match the bottom ends of both pieces.
Prepare matching thread and needle and stitch around the sides to join both pieces. Keep the top side of the smaller part open.
When done stitching tie a tight knot and cut off extra thread.
Finally, stitch the 2 green leaf patterns on the top side of the larger part of the carrot.
Place the larger leaf at the back and the smaller leaf at the front.
Tie a knot at the end and cut off extra thread.
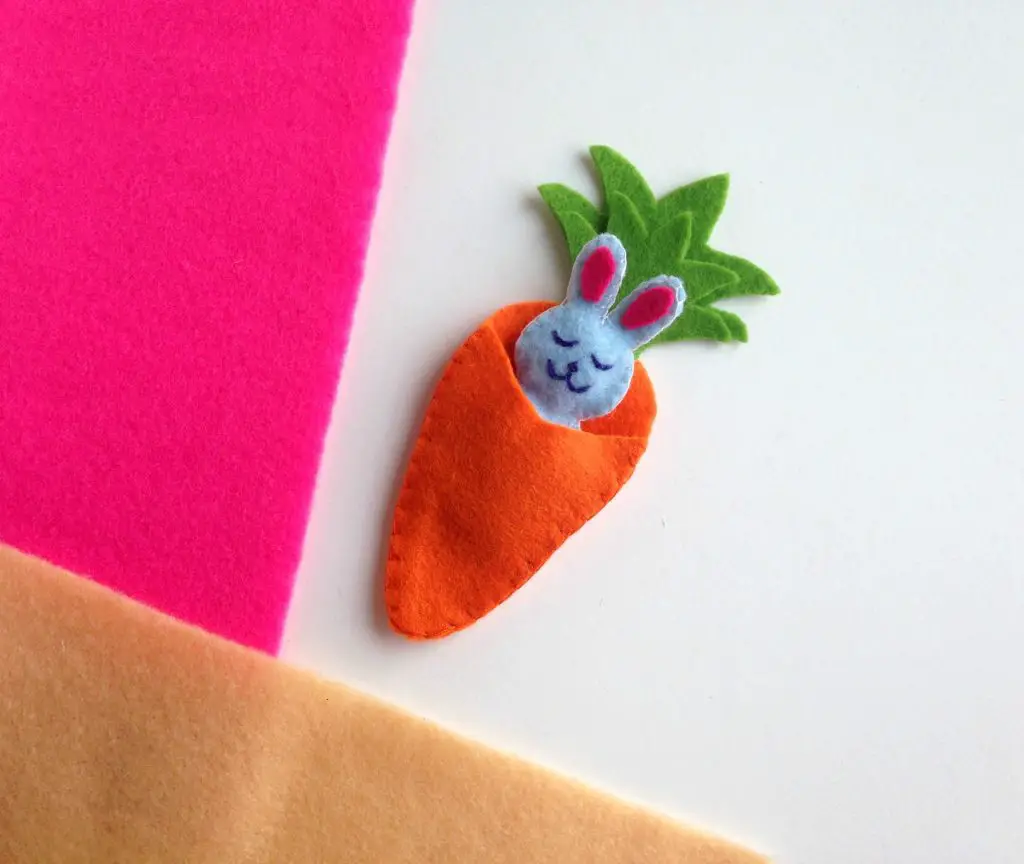
Place the bunny inside the carrot pouch and let it sleep!
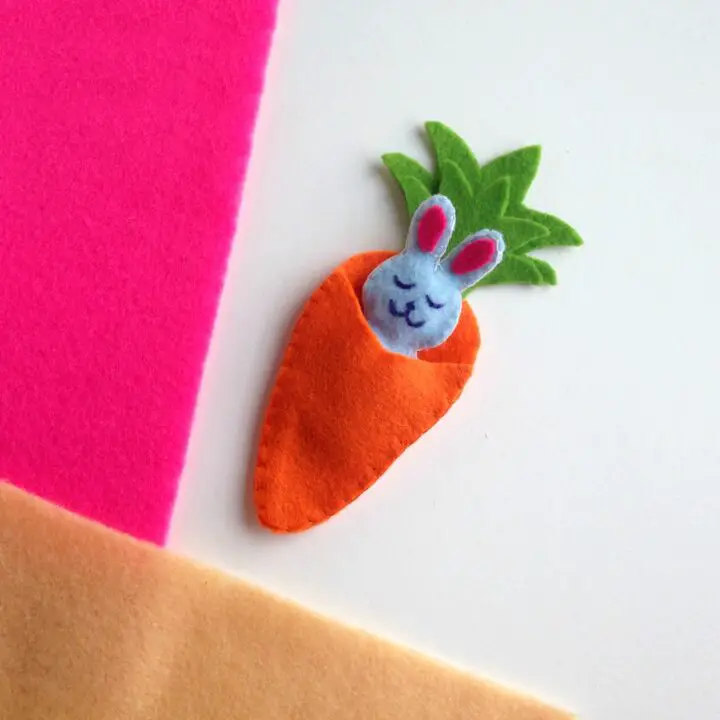
Bunny Easy Easter Felt Craft Learn to Sew Project
This easy Easter felt craft is a cute way to teach your children to sew.
Materials
- Felt fabric – orange, green, and 2 or 3 other colors of your choice.
- Scissors
- Matching thread and needle
- Fabric glue (optional)
- Pencil – to trace the template
- Template
Instructions
- Print and cut out the patterns from the template. Trace the patterns on the selected felt fabrics and cut them out carefully.
- There are 2 body parts for the bunny, take any one of the body parts and prepare black or dark-colored thread and needle.
- Draw the face details and stitch the details by simply doing flat blanket stitches.
- Once done stitching the face details attach the 2 inner parts of the ears and the heart pattern.
- You can either glue or stitch these patterns, however, you wish to.
- Place the 2 body parts together (one on the top of the other one), placing the detailed part on the top.
- Prepare needle and thread to stitch around the sides of both parts to join them.
- Start the stitch from anywhere but make sure to keep a small opening for stuffing. You can use the leftover felt pieces for the stuffing. Cut the leftover felt pieces into small pieces.
- Fill the bunny pattern with the felt pieces, use something thin and pointy (a pencil should do) to push the stuffing towards the head of the bunny.
- Done stuffing? Close the open end to secure the stuffing. Tie 2 tight knots and cut off extra thread.
- Take the 2 parts for the carrots and place the smaller one on the top of the big one; match the bottom ends of both pieces.
- Prepare matching thread and needle and stitch around the sides to join both pieces. Keep the top side of the smaller part open.
- When done stitching tie a tight knot and cut off extra thread.
- Finally, stitch the 2 green leaf patterns on the top side of the larger part of the carrot.
- Place the larger leaf at the back and the smaller leaf on the front.
- Tie a knot at the end and cut off extra thread.


That is the cutest little craft ever! You did such an amazing job on this. I have to make some of these for the kids.
This is adorable! I would love to do this with my girls over Easter break.
Such a cute and fun idea. I love your creativity. I wish I could be talented like you. So impressive.
What a cute project for little ones. My nieces would love making this.
I love to do sewing projects with my kids. I think it is a valuable skill all kids should learn. I will have to make some of these. Thanks for the great idea.